Workshop
Having read my biography you'll realise that teaching is a main activity
of mine. At present I teach art part time in primary schools and have an
adult class that I teach at home. Over the years I have developed my own
methods of teaching that I thought I would pass on. The activities will
be in no particular order, just something you can dip into if you wish.
Any drawings or patterns can be printed off for your own use, not for sale,
and giving me the credit on the finished work where due.
Old English Stars Workshop.

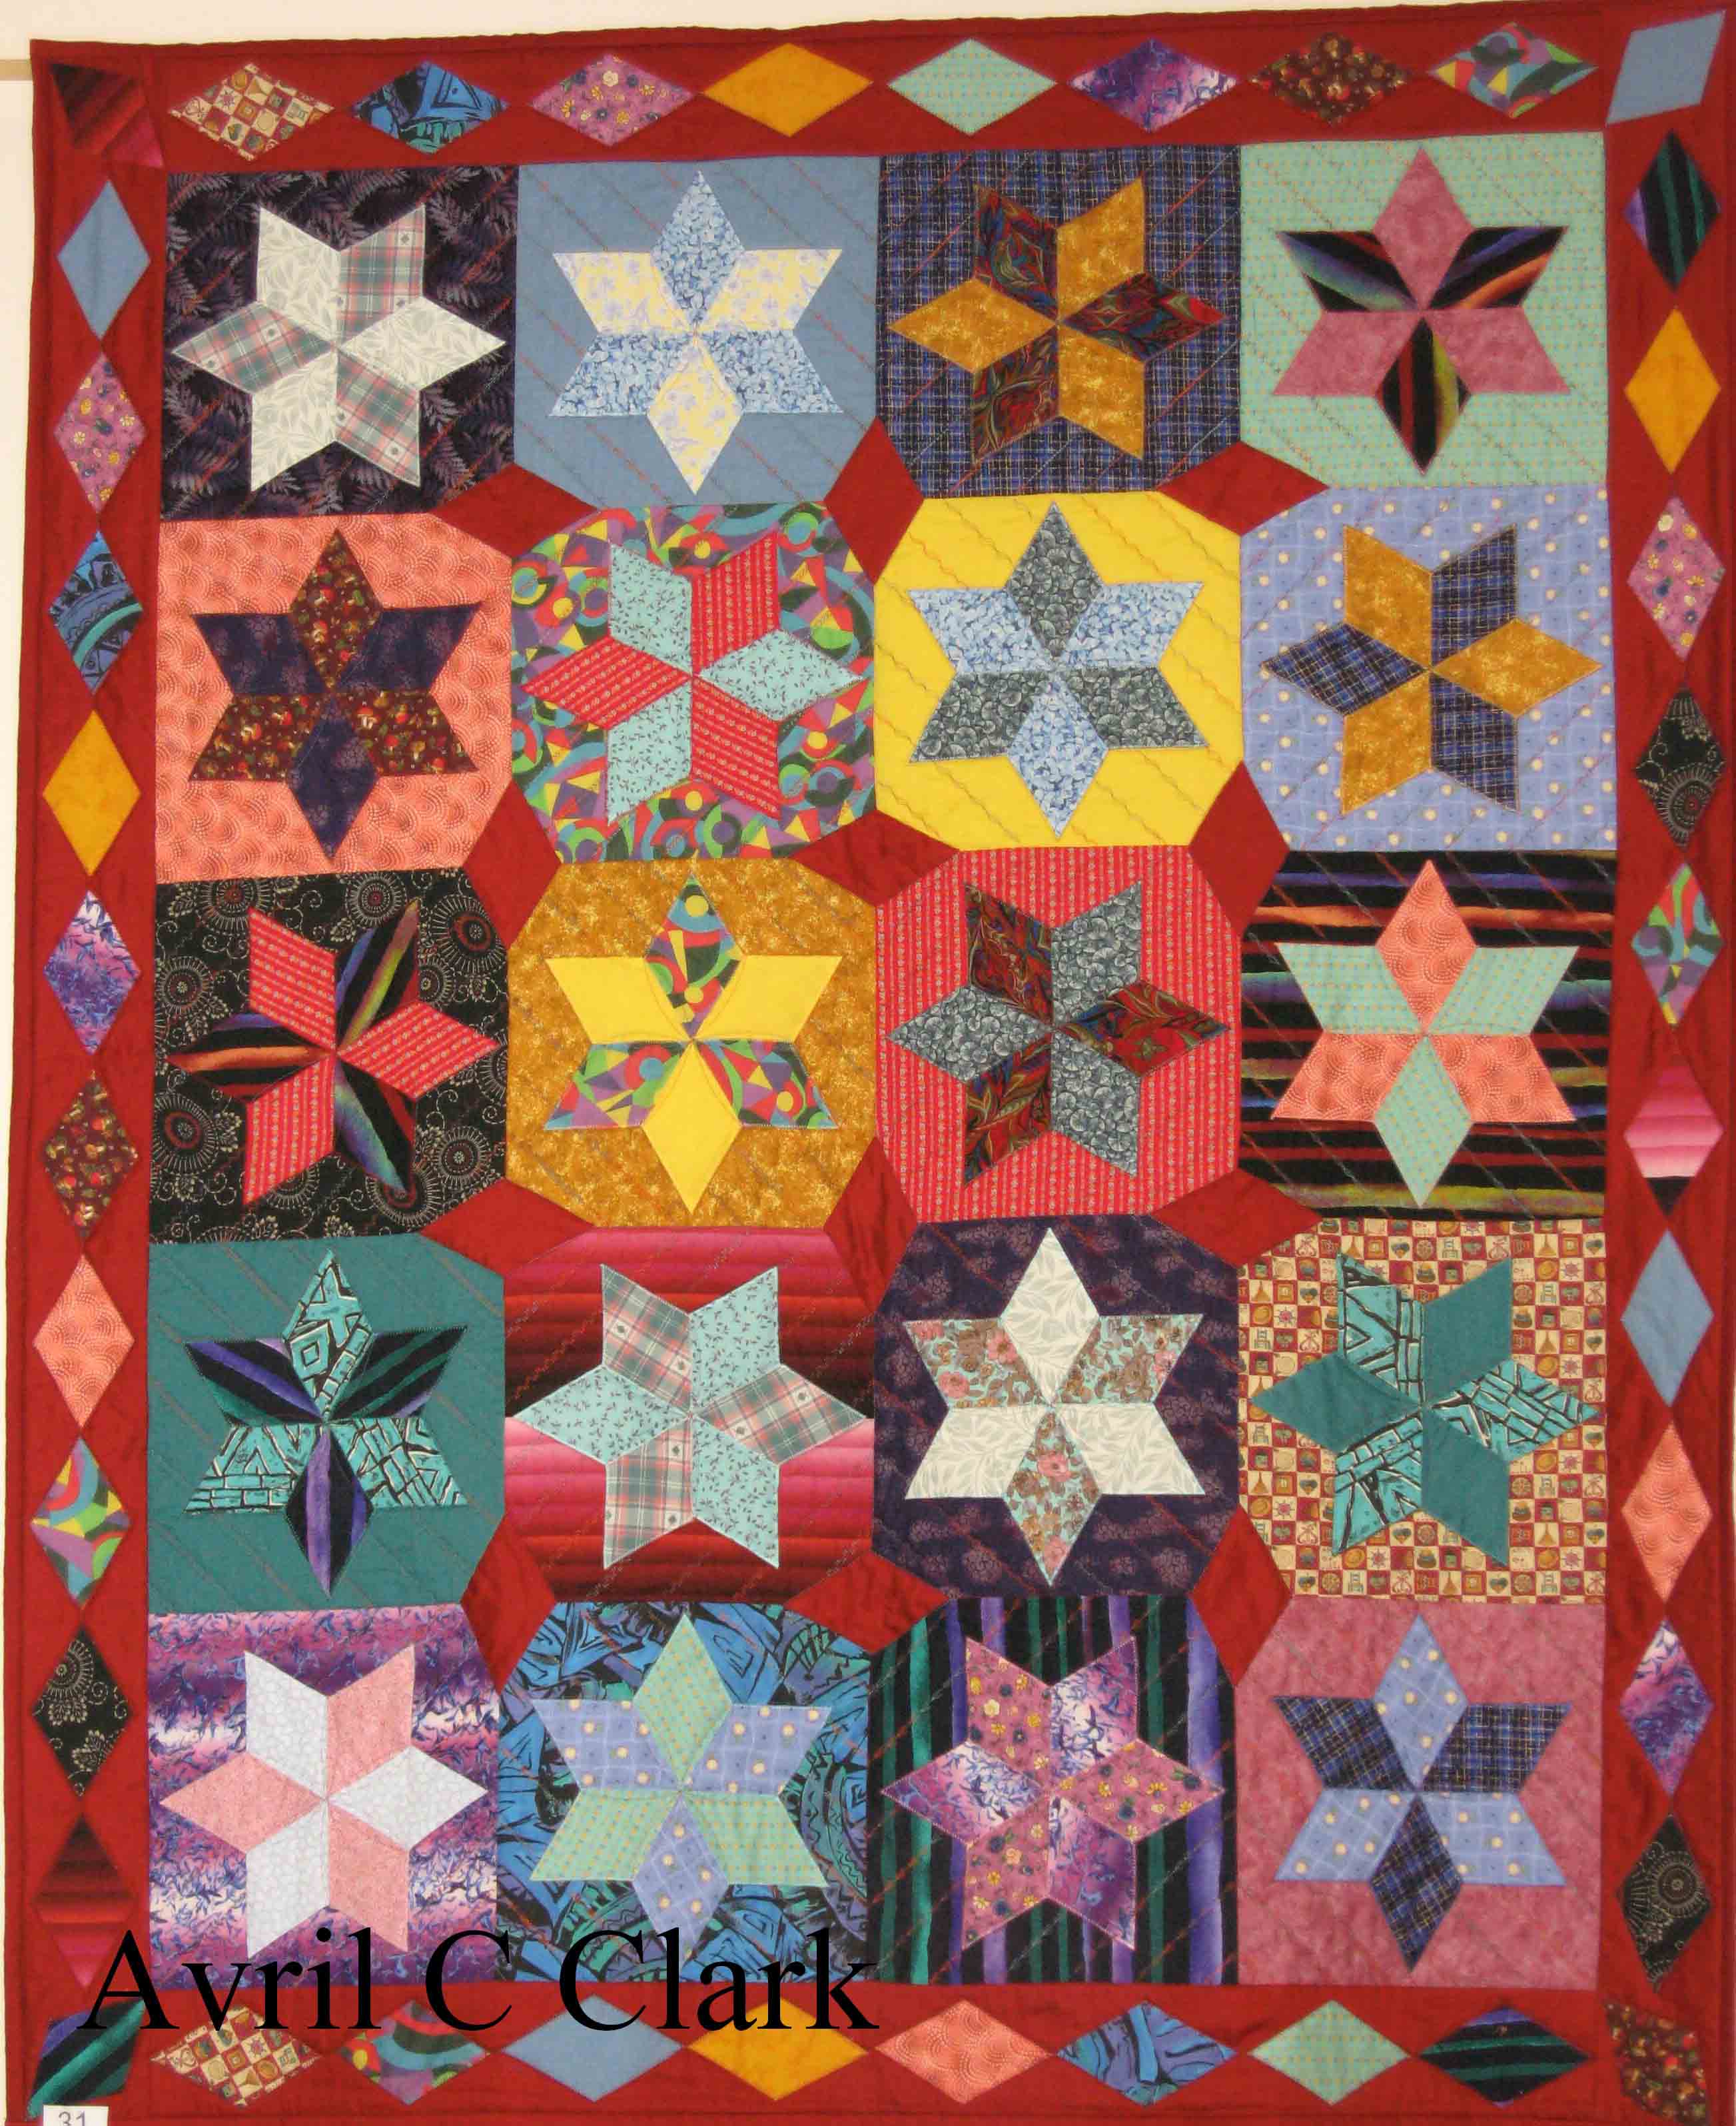
In this quilt, which can be viewed in gallery shop, I used English paper
piecing but speeded up the process by machine stitching the diamonds together.
The idea behind the quilt was to use up my supply of Fat Quarters of fabric
that you don't know what to do with.
1). Select 3 FQ's to start you off , preferably ones
that sort of go together but you maybe don't like the prints, it is after
all a scrap quilt.
2). Refer to the diagram and if you do it to contain the shapes in an A4
sheet you can just print off the template on your printer. You can then
just cut up the paper for the English piecing.
3). Pin 3 diamonds onto one fabric and 3 onto the other and cut out with
a centimetre allowance around each. Pin or tape round the paper and tack
in place.
4). Place one of each colour of the diamonds together and zig zag with your
machine, use an anchoring stitch at the start and the finish. I just chose
a thread that picked up one of the colours.
5). Continue piecing the diamonds together to form a star alternating the
colours.
6). Place the star onto a 12 ½" square of your other fabric
and zig zag round the edge again anchoring the stitching.
7). Turn over to the back and cut away the background material where the
star is and then take out the tacking and the papers to complete the block.
8). If you want to make it into a quilt you just keep adding in more FQ's
or finish it off as a panel.
Fallen Leaves by Avril C Clark
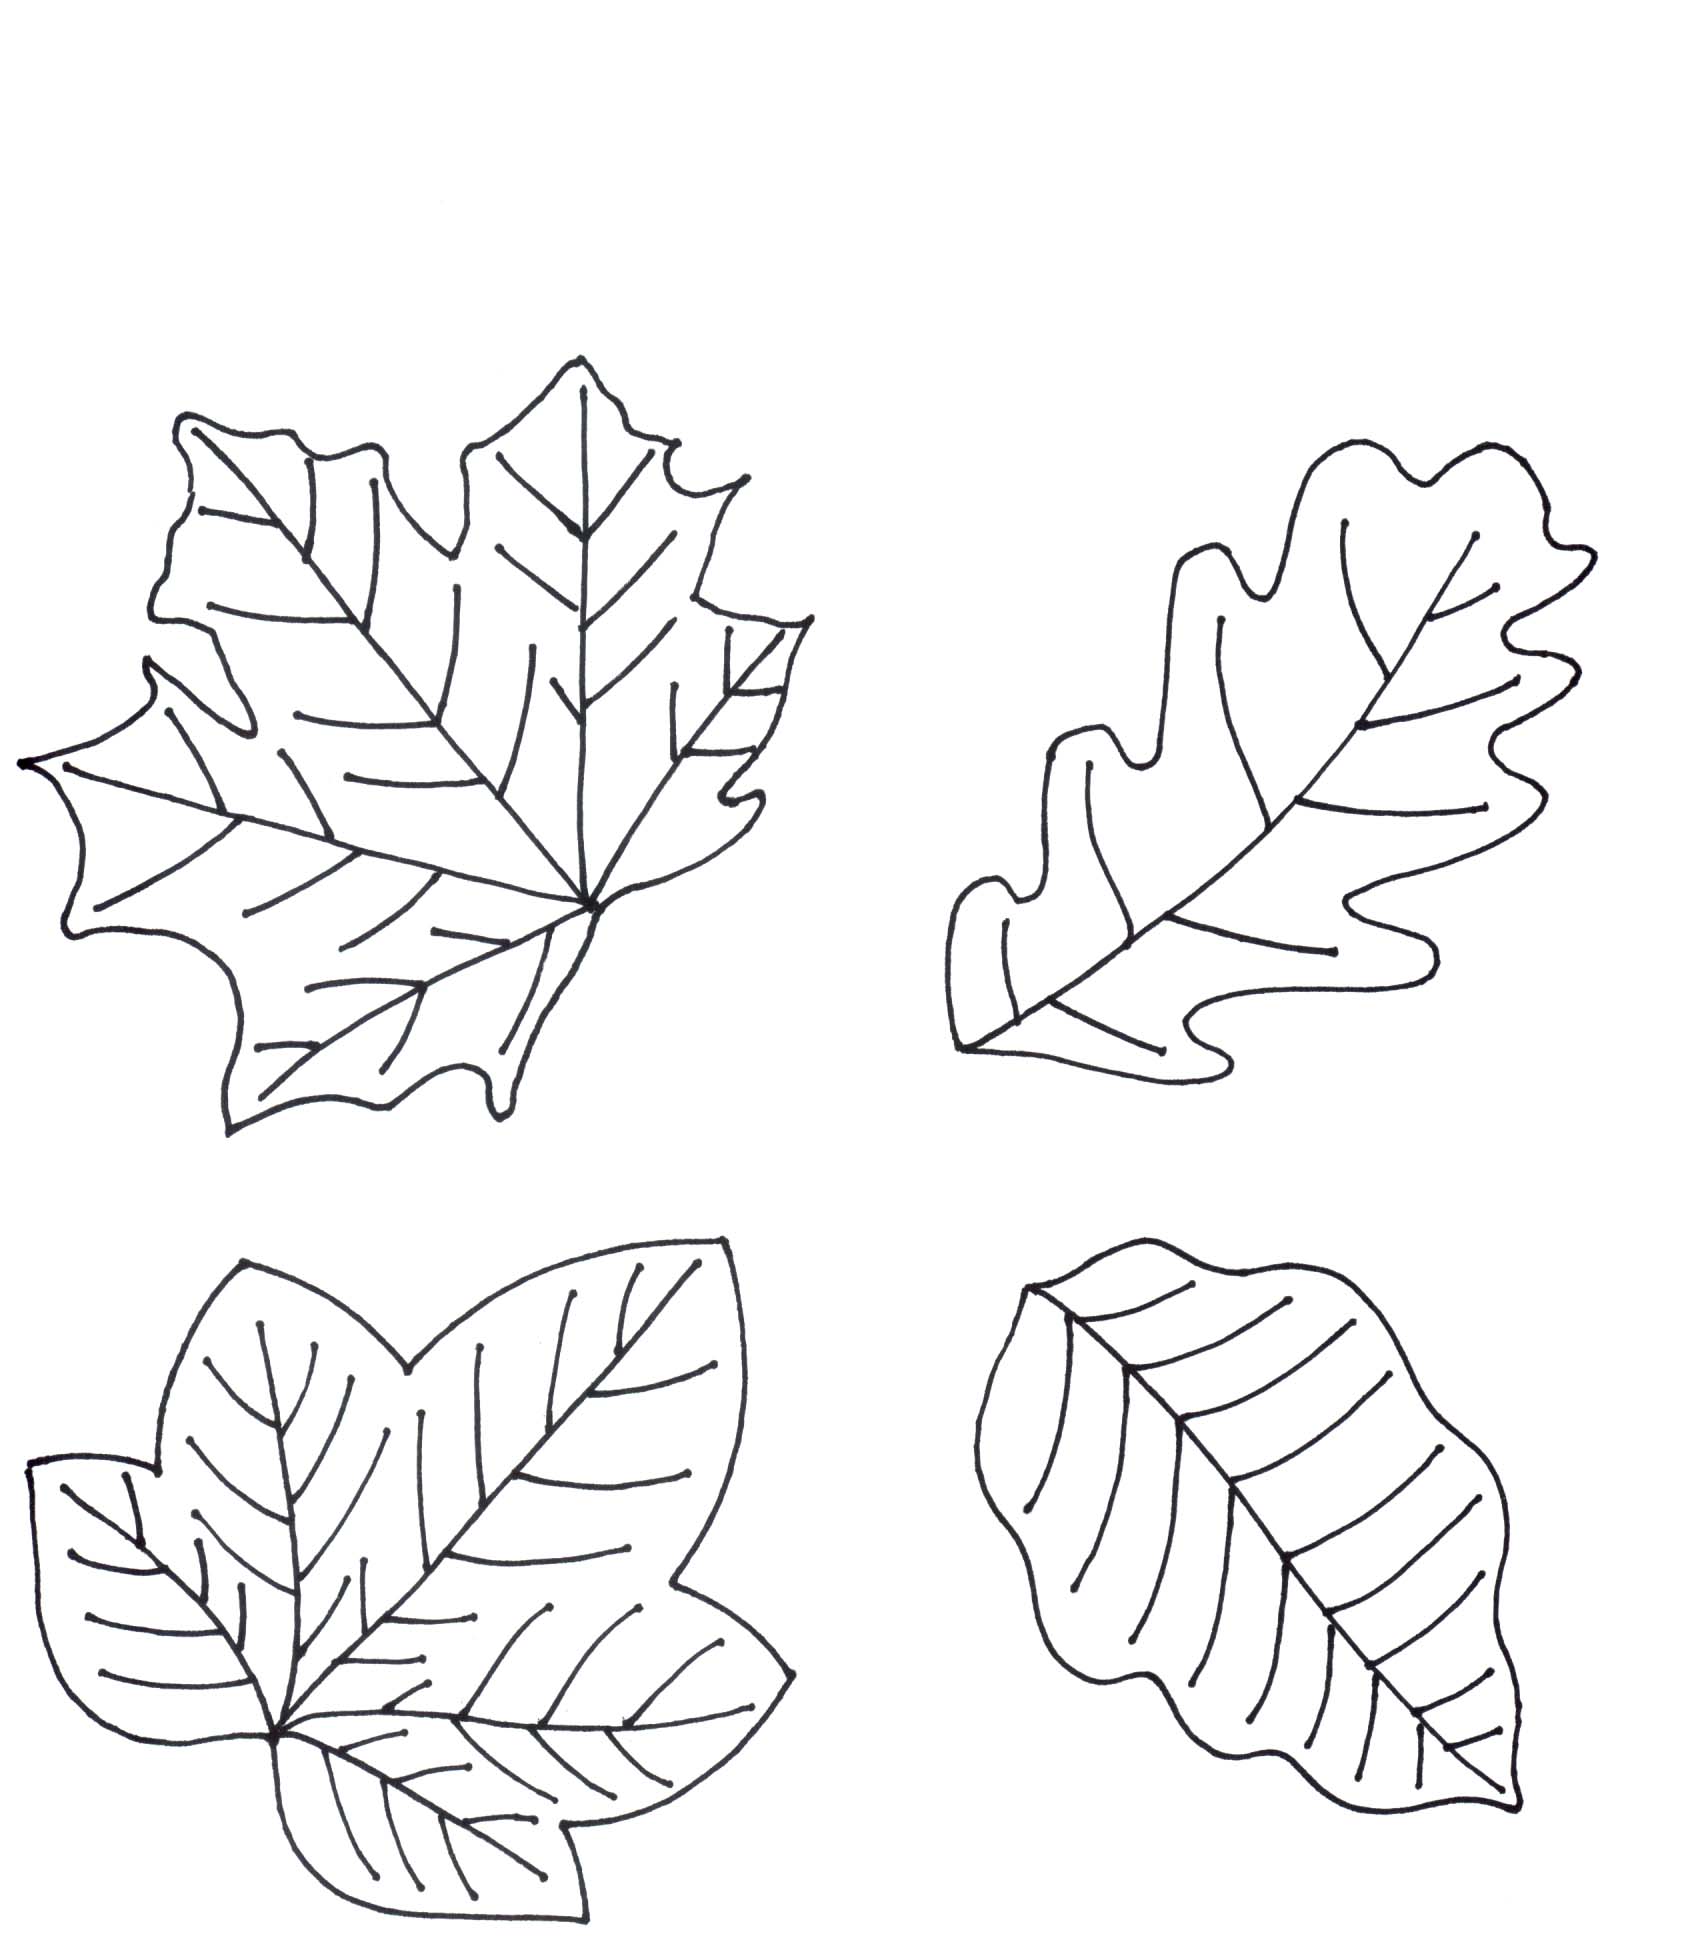
In this block the leaves are only held by the centre vein so that they can curl upon the block. I like the grey fabric as a background with the autumn colours as it suggests the grey clouds of Scotland. It is free machine embroidered and pieced. Then Tulip paint is used for the edge of the leaves. When the block is finished you can use it for a wall hanging, bag or cushion.
1). You will need eight fabrics from your stash in
autumn colours, reds, golds, browns and oranges. Plains and textures are
better than something with a definite print is.
2). Grey fabric again textured. Either one piece or different bits.
3). A random dyed thread in a suitable colour for veins. I used a green/beige/brown.
Plus an ordinary thread for the piecing.
4). Bondaweb or similar bonding product.
5). Freezer paper.
6). Tulip paint, I used a pearlised green, but gold or bronze would be nice.
1). Cut 4" squares of fabric from each of the
autumn colours and pair them up, like red with a gold and so on. Now bond
the pairs together so you have four double-sided pieces.
2). Print out the leaf pattern from the computer, and trace the leaves and
veins onto the freezer paper. You could iron a piece of freezer paper to
the printed leaves to hold it while you trace.
3). Cut round the outline of the leaves
4). Iron a freezer paper leaf onto each 4" block.
5). Put your random thread onto your machine and set it for free machine
embroidery and stitch the veins through the freezer paper. At this stage
you can also machine a stock on. Tip: When you go up and down the veins
make sure you don't leave any spaces or you will have to pick out the paper
after.
6). When you've finished you can now use the Tulip paint to draw round the
outline shape of the leaf and leave to dry overnight. Tip: Try not to touch
the edge of the paper.
7). Meanwhile Cut the grey fabric in 5 ½" squares. With the
eight shades of autumn colours cut 2" strips to make the borders. Assemble
it in courthouse steps style. Tip: When you put the four blocks together
have a short end touching the long end strip.
8). Take the dried leaves and peel off the paper template, picking out any
bits of paper.
9). Finally place each leaf in the centre of the squares and stitch up the
main vein with the random thread. You don't have to go the whole length
of the vein. Slightly curl the leaf so a hint of the underside shows.

 |
|
 |
|
 |
|
 |
|
 |
|
 |
|
 |